In suse the kmail folder is situated in /home/user/.kde/share/apps/kmail.
If you have reinstalled your system and opening kmail and clikkin on mails they magically disappears ... well I think it is a kmail bug!!!
Anyway just stop clikkin on mails, close kmail, go in emails folder (the folder above) and delete all indexes (*index*)
hope to have been clear and helpfull as usual.
happy suse, happy people.
Antonio
lunedì, marzo 27, 2006


lunedì, gennaio 16, 2006
FreeNX on SuSE 10.0 and 9.3
Well... FreeNX is the best remote controlling system now on earth and pretty easy to install on our Suse distro.
Just open YaST and search for freenx and select all related packets.
Do you think it's enoght? the answer that you are waitin for it's NO :D
I put here a link of a well done tutorial on MadPenguin.org ( cause, you know, I'm lazy :P )
And for you that dont understand why you cant still connect after this tutorial, here is the troubleshoot:
Error message Server not installed or NX access disabled
If you see the following error message it means that the nx user's public key was not accepted.:
NX> 203 NXSSH running with pid: 6721
NX> 285 Enabling check on switch command
NX> 285 Enabling skip of SSH config files
NX> 200 Connected to address: 192.168.2.21 on port: 22
NX> 202 Authenticating user: nx
NX> 208 Using auth method: publickey
NX> 204 Authentication failed.
This can be caused by a couple of things.
the nx user's authorized key file /var/lib/nxserver/home/.ssh/authorized_keys2 is incorectly named. All versions of ssh that I have seen on Ubuntu, Fedora, Redhat/Centos and OFCOURSE suse are configured to look for an authoized key file names .ssh/authorized_keys not .ssh/authorized_keys2. You can rename the authorized_keys file but it might be better to reconfigure sshd_config because the nxserver --stop command renames the .ssh/authorized_keys2 to .ssh/authorized_keys2.disabled to prevent access via an nxclient
sshd is not running or is incorrectly configured. At minimum you need PubkeyAuthentication yes in the sshd_config file
The server and client public keys might be different. At install the server and client use a default key which should be changed. You can open /var/lib/nxserver/home/.ssh/authorized_keys and compare its contents to the key stored in the client by:
Open the client tool
Click the Configure button
Click the Key button on the General Tab
Ensure that the key matches the key found in /var/lib/nxserver/home/.ssh/authorized_keys on the server
Enjoy FreeNX, enjoy openSuSE
Antonio
Just open YaST and search for freenx and select all related packets.
Do you think it's enoght? the answer that you are waitin for it's NO :D
I put here a link of a well done tutorial on MadPenguin.org ( cause, you know, I'm lazy :P )
And for you that dont understand why you cant still connect after this tutorial, here is the troubleshoot:
Error message Server not installed or NX access disabled
If you see the following error message it means that the nx user's public key was not accepted.:
NX> 203 NXSSH running with pid: 6721
NX> 285 Enabling check on switch command
NX> 285 Enabling skip of SSH config files
NX> 200 Connected to address: 192.168.2.21 on port: 22
NX> 202 Authenticating user: nx
NX> 208 Using auth method: publickey
NX> 204 Authentication failed.
This can be caused by a couple of things.
the nx user's authorized key file /var/lib/nxserver/home/.ssh/authorized_keys2 is incorectly named. All versions of ssh that I have seen on Ubuntu, Fedora, Redhat/Centos and OFCOURSE suse are configured to look for an authoized key file names .ssh/authorized_keys not .ssh/authorized_keys2. You can rename the authorized_keys file but it might be better to reconfigure sshd_config because the nxserver --stop command renames the .ssh/authorized_keys2 to .ssh/authorized_keys2.disabled to prevent access via an nxclient
sshd is not running or is incorrectly configured. At minimum you need PubkeyAuthentication yes in the sshd_config file
The server and client public keys might be different. At install the server and client use a default key which should be changed. You can open /var/lib/nxserver/home/.ssh/authorized_keys and compare its contents to the key stored in the client by:
Open the client tool
Click the Configure button
Click the Key button on the General Tab
Ensure that the key matches the key found in /var/lib/nxserver/home/.ssh/authorized_keys on the server
Enjoy FreeNX, enjoy openSuSE
Antonio
martedì, dicembre 06, 2005
CUPS and HOTPLUG
This is a really short HOWTO to configure hotplug to auto-enable usb printer on pluggin in :)
1) lsusb -v show, if printer is plugged in, his ID and VENDOR.
2) create file printer.usermap in /etc/hotplug/usb/
Here we will paste this :
Here create the script like this example that enable and accept jobs for a printer:
happy hotpluggin
antonio
1) lsusb -v show, if printer is plugged in, his ID and VENDOR.
2) create file printer.usermap in /etc/hotplug/usb/
Here we will paste this :
printer 0x0003 0x[yourprinterid] 0x[yourprintervendorid] 0x0000 0x0000 0x00 0x00 0x00 0x00 0x00 0x00 0x000000003) create file printer in /etc/hotplug/usb/
Here create the script like this example that enable and accept jobs for a printer:
#!/bin/bash4) dont forget to chmod the file to make it executable :)
if [ "${ACTION}" = "add" ]
then
lpadmin -p printername -E
fi
happy hotpluggin
antonio
sabato, dicembre 03, 2005
virtual nameservers
Maybe nobody need these informations if not interested in webserver management :)
Virtual nameservers:
I'm pointing my nameservers to the IPs of my webhost's nameservers. So it sounds like 'virtual' is the correct term. Using your example,
ns1.mydomain.com => IP of dnsmyhoster.com's DNS server #1
ns2.mydoman.com => IP of dnsmyhoster.com's DNS server #2
Step 1. Create the nameservers at the registrar (contact your registrar if you dont have direct access).
NS1.mydomain.com => IP#1
NS2.mydomain.com => IP#2
Step 2. Create the nameservers at the host.
It currently looks like this:
example.com. => ns1.dnsmadeeasy.com. (type: NS)
example.com. => ns2.dnsmadeeasy.com. (type: NS)
Should be changed like this:
example.com. => ns1.example.com. (type: NS)
example.com. => ns2.example.com. (type: NS)
Step 3. Add A records on the authoritative DNS servers at the host.
This looks easy enough.
ns1.example.com. => IP#1 (type: A record)
ns2.example.com. => IP#2 (type: A record)
happy hosting
antonio
Virtual nameservers:
I'm pointing my nameservers to the IPs of my webhost's nameservers. So it sounds like 'virtual' is the correct term. Using your example,
ns1.mydomain.com => IP of dnsmyhoster.com's DNS server #1
ns2.mydoman.com => IP of dnsmyhoster.com's DNS server #2
Step 1. Create the nameservers at the registrar (contact your registrar if you dont have direct access).
NS1.mydomain.com => IP#1
NS2.mydomain.com => IP#2
Step 2. Create the nameservers at the host.
It currently looks like this:
example.com. => ns1.dnsmadeeasy.com. (type: NS)
example.com. => ns2.dnsmadeeasy.com. (type: NS)
Should be changed like this:
example.com. => ns1.example.com. (type: NS)
example.com. => ns2.example.com. (type: NS)
Step 3. Add A records on the authoritative DNS servers at the host.
This looks easy enough.
ns1.example.com. => IP#1 (type: A record)
ns2.example.com. => IP#2 (type: A record)
happy hosting
antonio
giovedì, novembre 24, 2005
d-link dns bugs on DSL-G604T and similar SHIT
Well, this is the second bug (the first was ipv6) I've found on this stupid router (like all d-link stuff) that made me crazy...
Some applications are unable to resolve domains (such as wget, lynx and whois in my case) and I didn't knew why until I changed the default nameserver (the router address from dhcp) on /etc/resolv.config to the ones gave from my ISP: ALL MAGICALLY WORKS NOW (FUCK!!!)
If you don't like dhcpcd to change your nameserver settings then either set DHCLIENT_MODIFY_RESOLV_CONF=no in /etc/sysconfig/network/dhcp, or set MODIFY_RESOLV_CONF_DYNAMICALLY=no in /etc/sysconfig/network/config or (manually) use dhcpcd with -R. If you only want to keep your searchlist, set DHCLIENT_KEEP_SEARCHLIST=yes in /etc/sysconfig/network/dhcp or (manually) use the -K option.
see you
antonio
Some applications are unable to resolve domains (such as wget, lynx and whois in my case) and I didn't knew why until I changed the default nameserver (the router address from dhcp) on /etc/resolv.config to the ones gave from my ISP: ALL MAGICALLY WORKS NOW (FUCK!!!)
If you don't like dhcpcd to change your nameserver settings then either set DHCLIENT_MODIFY_RESOLV_CONF=no in /etc/sysconfig/network/dhcp, or set MODIFY_RESOLV_CONF_DYNAMICALLY=no in /etc/sysconfig/network/config or (manually) use dhcpcd with -R. If you only want to keep your searchlist, set DHCLIENT_KEEP_SEARCHLIST=yes in /etc/sysconfig/network/dhcp or (manually) use the -K option.
see you
antonio
giovedì, novembre 17, 2005
the Cron Jobs :)
(* extract from suse administration manual )
The cron tables are located in /var/spool/cron/tabs. /etc/crontab serves as a systemwide cron table. Enter the name of the user who should run the command directly after the time table. In Example 10.1, “Example of an Entry in /etc/crontab”, root is entered. Package-specific tables, located in /etc/cron.d, have the same format. See man cron.
Example 10.1. Example of an Entry in /etc/crontab
1-59/5 * * * * root test -x /usr/sbin/atrun && /usr/sbin/atrun
/etc/crontab cannot be processed with crontab -e. It must be loaded directly into an editor, modified, then saved.
A number of packages install shell scripts to the directories /etc/cron.hourly, /etc/cron.daily, /etc/cron.weekly, and /etc/cron.monthly, whose instructions are controlled by /usr/lib/cron/run-crons. /usr/lib/cron/run-crons is run every 15 minutes from the main table (/etc/crontab). This guarantees that processes that may have been neglected can be run at the proper time.
The daily system maintenance jobs have been distributed to various scripts for reasons of clarity. They are contained in the package aaa_base. /etc/cron.daily contains, for instance, the components backup-rpmdb, clean-tmp, or clean-vi.
The cron tables are located in /var/spool/cron/tabs. /etc/crontab serves as a systemwide cron table. Enter the name of the user who should run the command directly after the time table. In Example 10.1, “Example of an Entry in /etc/crontab”, root is entered. Package-specific tables, located in /etc/cron.d, have the same format. See man cron.
Example 10.1. Example of an Entry in /etc/crontab
1-59/5 * * * * root test -x /usr/sbin/atrun && /usr/sbin/atrun
/etc/crontab cannot be processed with crontab -e. It must be loaded directly into an editor, modified, then saved.
A number of packages install shell scripts to the directories /etc/cron.hourly, /etc/cron.daily, /etc/cron.weekly, and /etc/cron.monthly, whose instructions are controlled by /usr/lib/cron/run-crons. /usr/lib/cron/run-crons is run every 15 minutes from the main table (/etc/crontab). This guarantees that processes that may have been neglected can be run at the proper time.
The daily system maintenance jobs have been distributed to various scripts for reasons of clarity. They are contained in the package aaa_base. /etc/cron.daily contains, for instance, the components backup-rpmdb, clean-tmp, or clean-vi.
lunedì, novembre 14, 2005
Skype for Linux Resources
mercoledì, ottobre 19, 2005
ps2 optical mouse
It is sooo strange but this Logitech optical doesnt work on OpenSuse 10.0 and you have to act a trick. I hate this cause people get far from linux when they get problems like this =( and I HATE this... wanna see linux on every machine I sell and I hope this for the future.
Anyway this is the trick:
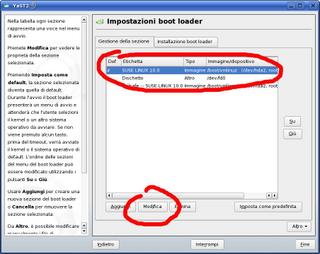
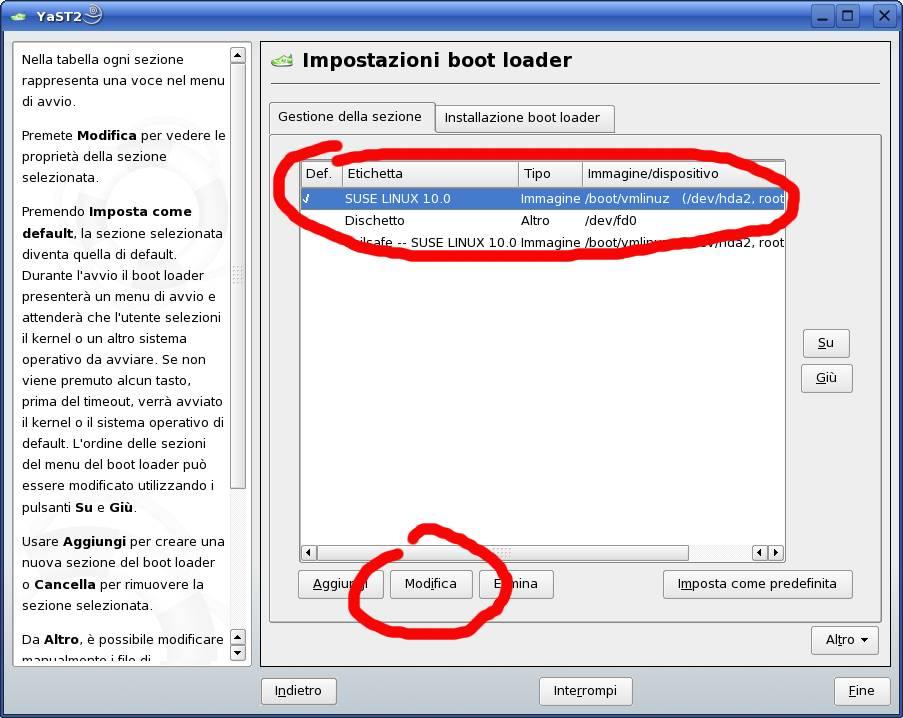
open Yast -> System -> bootloader configuration
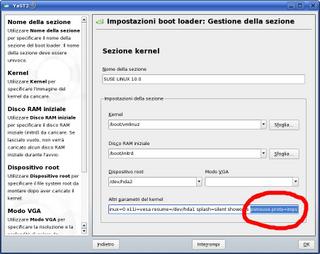
modify the boot option and add psmouse.proto=imps to Other Kernel Parameters
reboot
and that's it!
enjoy your suse
Antonio
Anyway this is the trick:
open Yast -> System -> bootloader configuration
modify the boot option and add psmouse.proto=imps to Other Kernel Parameters
reboot
and that's it!
enjoy your suse
Antonio

martedì, ottobre 18, 2005
ipv6 problems AGAIN
AGAIN since 9.1 version, ipv6 still break your internet connection, delaying DNS answere and giving the TIMEOUT ERROR!
To disable this annoying thing, just edit /etc/modules.conf, go to the line containing "net-pf-10 ipv6" and change to "net-pf-10 off".
Restart your machine and the world will smile again!
happy suse!
antonio
To disable this annoying thing, just edit /etc/modules.conf, go to the line containing "net-pf-10 ipv6" and change to "net-pf-10 off".
Restart your machine and the world will smile again!
happy suse!
antonio
lunedì, ottobre 17, 2005
use common YaST sources on every PC
If you want to transfer all YaST source installation settings to another machine without adding every source manually copy this folder from the configured machine to the other one :)
/var/adm/YaST/InstSrcManager
enjoy your suse!
antonio
/var/adm/YaST/InstSrcManager
enjoy your suse!
antonio
martedì, ottobre 11, 2005
openSUSE 10.0 is out

After a long wait, the first community release of openSUSE is OUT and I'm really happy to update my systems.
Here I'll give you some reference links even if you dont really need it cause it's easy to find it on google :)
Download: http://www.opensuse.org/Mirrors_Released_Version
After the installation add more Yast sources to have a Complete operating system with all plugins you need for your browser, Java and more: http://www.opensuse.org/index.php/Package_Repositories
Other third parties YaST repositories: http://www.opensuse.org/YaST_package_repository
Happy openSUSE!
sabato, settembre 17, 2005
NTFS HowTO
Sometimes, in this world, it happen that you need to read from an NTFS partition with your fantastic SuSE 9.3 and you think it's easy to configure it with YaST -> patition ... and ... you find a bad surprise: IT DOESN'T WORK !!!!
Don't disperate babe, you always have the command line ;) and my instructions!!!
Open a shell and insert following commands:
If yours it's an external HD write this:
where "/dev/sdb1" could be different on your system and uid/gid too. To verify uid/gid just type "id" in a shell and find your user.
That's all folks!! Now you can mount your partition using "mount /dev/hda1"!!
Don't disperate babe, you always have the command line ;) and my instructions!!!
Open a shell and insert following commands:
mkdir /wherever/ntfsTo the last line insert:
chown root:users /wherever/ntfs
vim /etc/fstab
/dev/hda1 /wherever/ntfs ntfs ro,users,gid=users,umask=0002,nls=utf8 0 0where "/dev/hda1" could be different according to your ntfs partition. Ex. "/dev/sda1" for USB disks.
If yours it's an external HD write this:
/dev/sdb1 /wherever/ntfs subfs ro,users,uid=1000,gid=100,umask=0002,nls=utf8 0 0
where "/dev/sdb1" could be different on your system and uid/gid too. To verify uid/gid just type "id" in a shell and find your user.
That's all folks!! Now you can mount your partition using "mount /dev/hda1"!!
venerdì, luglio 01, 2005
/media error resolved
Have you got any problem wit /media directory? cannot automatically mount cd or usb drives? well, your solution is in fstab ( /etc/fstab ).
Check if in fstab that media directory is mounted Read-Only ( ro ). If so, edit it and change ro with rw ( read-write ). Well, now you can umount /media/ and mount it again ( mount /media/ )!!
well done
bye
antonio
Check if in fstab that media directory is mounted Read-Only ( ro ). If so, edit it and change ro with rw ( read-write ). Well, now you can umount /media/ and mount it again ( mount /media/ )!!
well done
bye
antonio
lunedì, maggio 02, 2005
Powersaved and CPU frequency
Sometimes, powersaved daemon, cannot recognize cpu correctly and load the necessary cpufreq module. To force loading of module concerning your CPU, modify /etc/sysconfig/powersave/cpufreq file adding the module to the voice POWERSAVE_CPUFREQD_MODULE="".
Full list of available modules could be find here
Full list of available modules could be find here
martedì, aprile 19, 2005
Name Resolution Does Not Work with Several Concurrent DHCP Clients
If you have some problems getting your wireless card work on startup and make you go on internet, READ THIS!
rapid solution ( in case you are lazy ):
Set the following option in the file ifcfg of all network devices configured as DHCP clients. This file is located at /etc/sysconfig/network/
DHCLIENT_PRIMARY_DEVICE=yes
rapid solution ( in case you are lazy ):
Set the following option in the file ifcfg of all network devices configured as DHCP clients. This file is located at /etc/sysconfig/network/
DHCLIENT_PRIMARY_DEVICE=yes
lunedì, aprile 18, 2005
Kde 3.4 and SuSE 9.2
As you can read in one of my previous post, changin installation sources, now you can upgrade to Kde 3.4 directly via yast.
>>> Easy!
Go to Yast control center, then choose 'Install/Remove packages'. In the new loaded panel choose 'packet groups' from the drop-down menu and then 'zzz.All' from left frame. Click with right button on right frame and hit 'all in this list->update if a new version is available'.
>>> End!
well done... enjoy your new Kde desktop!
bye
Antonio
>>> Easy!
Go to Yast control center, then choose 'Install/Remove packages'. In the new loaded panel choose 'packet groups' from the drop-down menu and then 'zzz.All' from left frame. Click with right button on right frame and hit 'all in this list->update if a new version is available'.
>>> End!
well done... enjoy your new Kde desktop!
bye
Antonio
mercoledì, aprile 13, 2005
NETGEAR WG511v2 (Marvell chip) and SuSE 9.2
Ladies and Gentlemen,
we are here reunited to celebrate the fantastic NDISWRAPPER and his team for make wireless work on our linux boxes and my SuSE Laptop too :)
Let's go to show how to make this fuckin pcmcia card to work (Gates slaves!!).... ohhhhhh shit, I dont wanna write now, it's late! it's 2:11 am and I'm sitting on a wc, havin my shit (yeeeessss i'm really on wireless, yeeeeeah!) and wanna go sleep soon so, check out this two links:
http://ndiswrapper.sourceforge.net/phpwiki/index.php?Installation
(HArd but worked for me!)
http://ndiswrapper.sourceforge.net/phpwiki/index.php/Suse%20Professional%209.2
(didnt work for netgear)
you can mix up the two articles and you will be wireless soon!
maybe next time I'll make a summary mix for you.
bye
antonio
TIP:
if you get an error loading the module ndiswrapper (moprobe ndiswrapper), do this:
rm /lib/modules/$(uname -r)/extra/ndiswrapper.ko
cp /lib/modules/$(uname -r)/misc/ndiswrapper.ko /lib/modules/$(uname -r)/extra
we are here reunited to celebrate the fantastic NDISWRAPPER and his team for make wireless work on our linux boxes and my SuSE Laptop too :)
Let's go to show how to make this fuckin pcmcia card to work (Gates slaves!!).... ohhhhhh shit, I dont wanna write now, it's late! it's 2:11 am and I'm sitting on a wc, havin my shit (yeeeessss i'm really on wireless, yeeeeeah!) and wanna go sleep soon so, check out this two links:
http://ndiswrapper.sourceforge.net/phpwiki/index.php?Installation
(HArd but worked for me!)
http://ndiswrapper.sourceforge.net/phpwiki/index.php/Suse%20Professional%209.2
(didnt work for netgear)
you can mix up the two articles and you will be wireless soon!
maybe next time I'll make a summary mix for you.
bye
antonio
TIP:
if you get an error loading the module ndiswrapper (moprobe ndiswrapper), do this:
rm /lib/modules/$(uname -r)/extra/ndiswrapper.ko
cp /lib/modules/$(uname -r)/misc/ndiswrapper.ko /lib/modules/$(uname -r)/extra
lunedì, aprile 04, 2005
Apache2 and Virtual Hosts (VHost)
In this article, i'll explain you how to set your Apache configuration on SuSE 9.2 to make your local websites visible on you machine. This is particularly useful for people like me who make websites and need to test them on their local machines before publish.
First of all, you need Apache installed on you machine via YaST with eventually PHP and MySql.
After that you'll have all apache configuration files under /etc/apache2 directory.
Well DONT TOUCH ANY FILE THERE!
The simplest thing you have to do is create a mysites.conf file wherever you want and hardlink it to /etc/apache2/vhosts.d
I created mysites.conf in my public_html for my personal comfort :)
What about mysites.conf content? HERE to you a simple example:
Thus, the last thing to do is adding all our virtual servers on /etc/hosts file to make them available. This file is only accessible via root and this is a sample:
What else now? Point your browser on the URL of your new virtual hosts like that:
Thats all folks!
good setting
First of all, you need Apache installed on you machine via YaST with eventually PHP and MySql.
After that you'll have all apache configuration files under /etc/apache2 directory.
Well DONT TOUCH ANY FILE THERE!
The simplest thing you have to do is create a mysites.conf file wherever you want and hardlink it to /etc/apache2/vhosts.d
I created mysites.conf in my public_html for my personal comfort :)
What about mysites.conf content? HERE to you a simple example:
NameVirtualHost *
<virtualhost>
ServerName localhost
ServerAlias linzekus
DocumentRoot /srv/www/htdocs
</virtualhost>
<virtualhost>
DocumentRoot /home/zekus/public_html/ontosofia/ontosophy
ServerName ontosophy
ServerAdmin antonio@linzekus
</virtualhost>
Thus, the last thing to do is adding all our virtual servers on /etc/hosts file to make them available. This file is only accessible via root and this is a sample:
#
# hosts This file describes a number of hostname-to-address
# mappings for the TCP/IP subsystem. It is mostly
# used at boot time, when no name servers are running.
# On small systems, this file can be used instead of a
# "named" name server.
# Syntax:
#
# IP-Address Full-Qualified-Hostname Short-Hostname
#
127.0.0.1 localhost linzekus XXXX <-list all virtual hosts HERE
# special IPv6 addresses
::1 localhost ipv6-localhost ipv6-loopback
fe00::0 ipv6-localnet
ff00::0 ipv6-mcastprefix
ff02::1 ipv6-allnodes
ff02::2 ipv6-allrouters
ff02::3 ipv6-allhosts
What else now? Point your browser on the URL of your new virtual hosts like that:
http://xxxx
Thats all folks!
good setting
lunedì, marzo 28, 2005
backup mysql tables and restore
it's easy to backup all you mysql tables: just go to /var/lib/mysql (on SuSE linux distro) and copy all folders, that's it.
If you record this forlders on a cd or dvd as backup and you lost all privilege settings, this is what you have to do after you copy back your backup on mysql folder:
chmod -R 766 *
chmod -R 700 mysql/
and all will work fine again!
go backup guys! ;)
If you record this forlders on a cd or dvd as backup and you lost all privilege settings, this is what you have to do after you copy back your backup on mysql folder:
chmod -R 766 *
chmod -R 700 mysql/
and all will work fine again!
go backup guys! ;)
Iscriviti a:
Post (Atom)